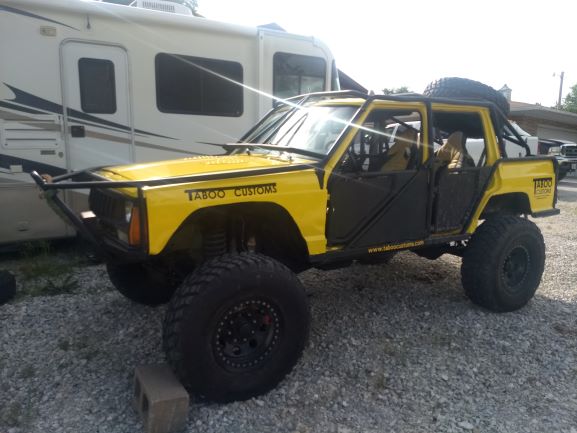
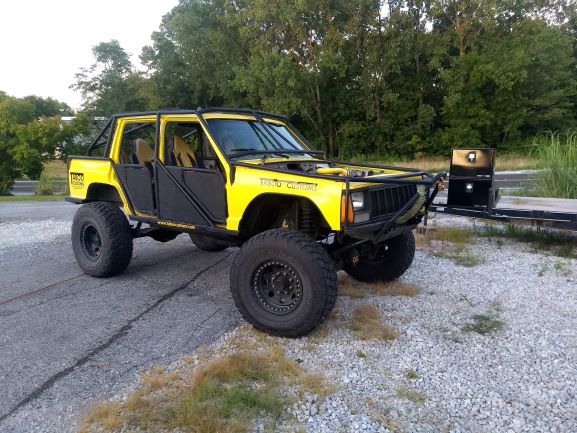
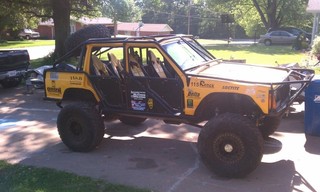
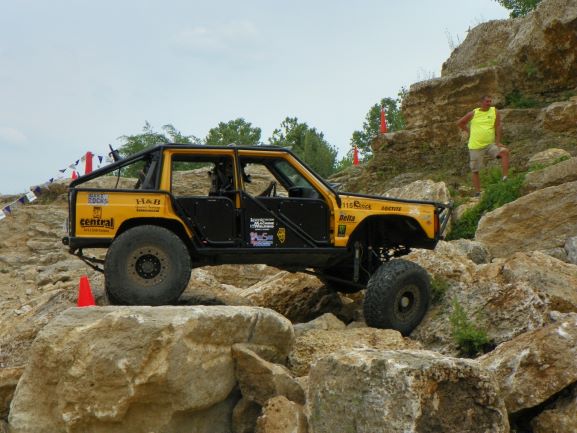
TEAM TABOO XJ 2009-2012, 2019 -
This jeep has come back home! After being sold in 2012, it came back to us in 2019. At the bottom we have added information on its current state.
Video walkaround of the Jeep in its current state.
-
1991 4.0 HO I6
-
1991 AW4 Automatic
-
Dana 300 Flipped, Twin Sticked
-
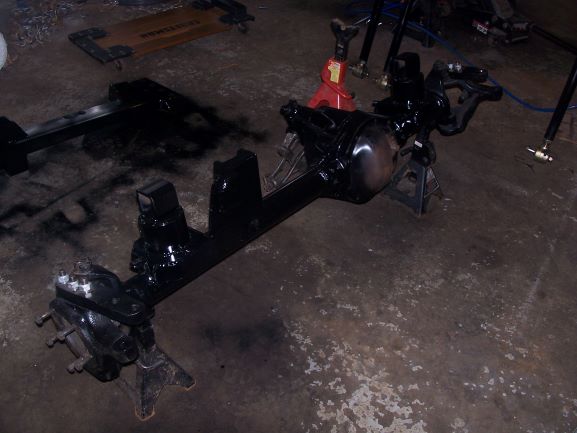
Front Axle: Dana 44 HP, OX Locker, 5.13 Gears (Switched to Dana 60 in 2011)
-
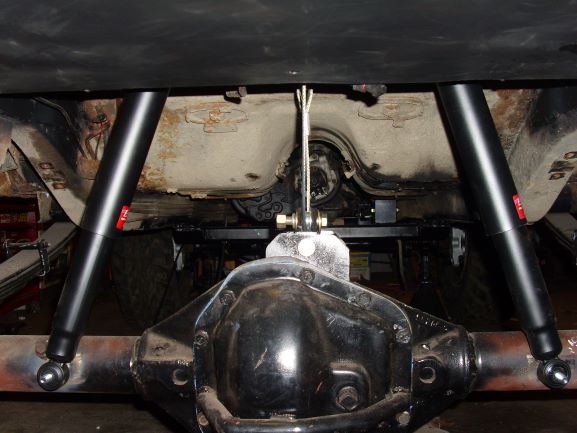
Rear Axle: Dana 60, Detroit Locker, 5.13 Gears, Shaved
-
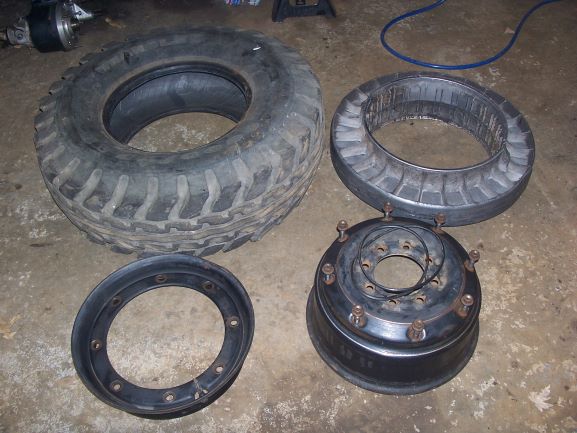
35" Tires, Military Humvee Beadlocks
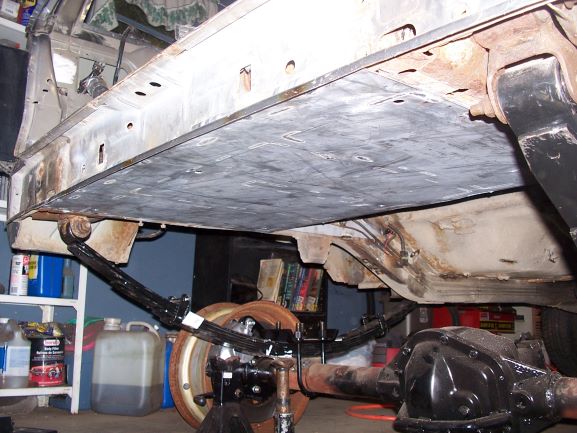
- Front: Coil Spring, Custom Long Arm
- Rear: Leaf Spring, 4.5" RE Springs, Slider Boxes
ORIGINAL
Originally the XJ was a plain stock XJ.
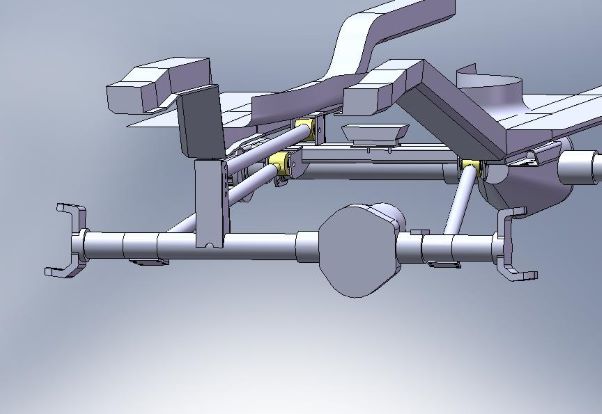
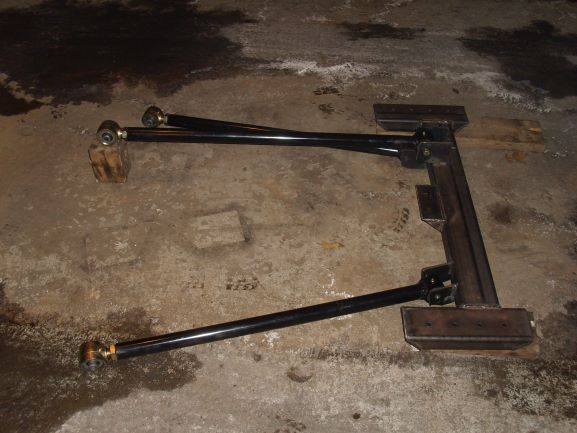
FRONT SUSPENSION
For the front suspension we designed a custom 3-link using Johnny Joints.
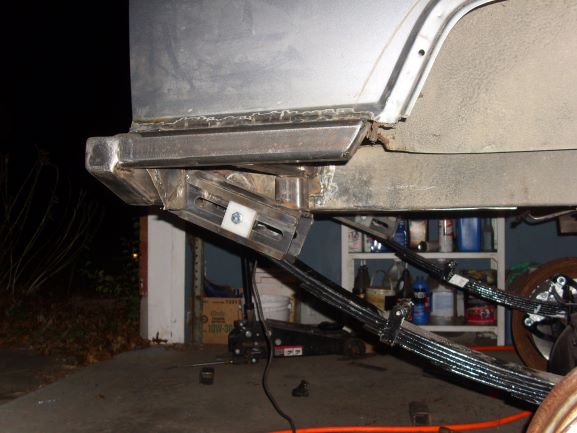
REAR SUSPENSION
Only unique thing about the rear suspension was that we used slider boxes instead of shackles. This setup worked out pretty well but really couldnt tell much of a difference over shackles.
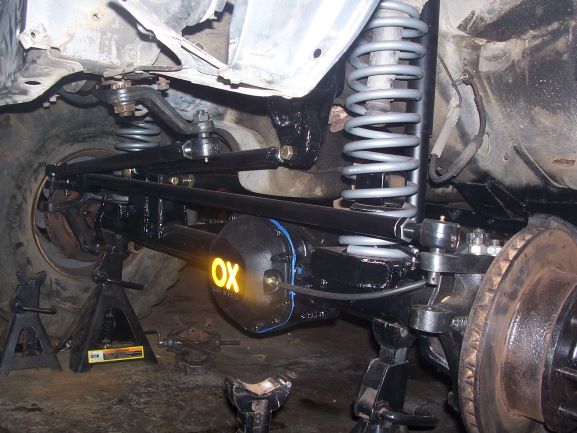
FRONT AXLE
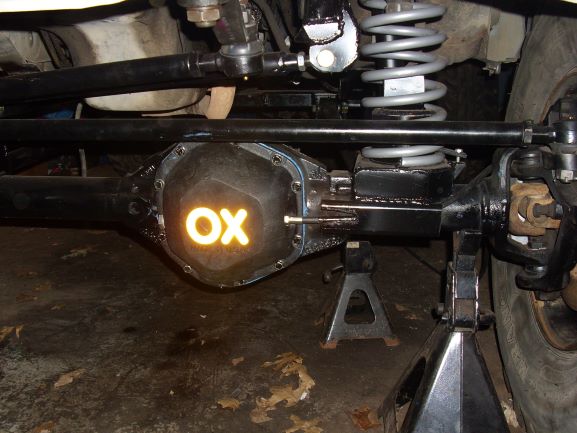
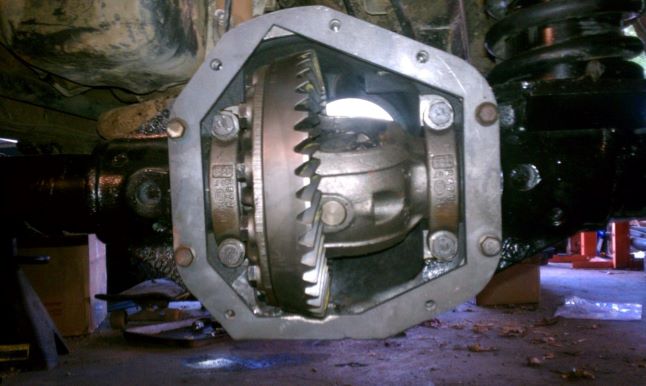
For the first couple years we used a high pinion dana 44. After two years we switched to a 1978 Ford high pinion Dana 60. In the 44 we ran an OX locker, with the 60 we welded the spider gears, in both we ran 5.13 gears.
Dana 44
OX installed, we had to make a guard for the OX cable.
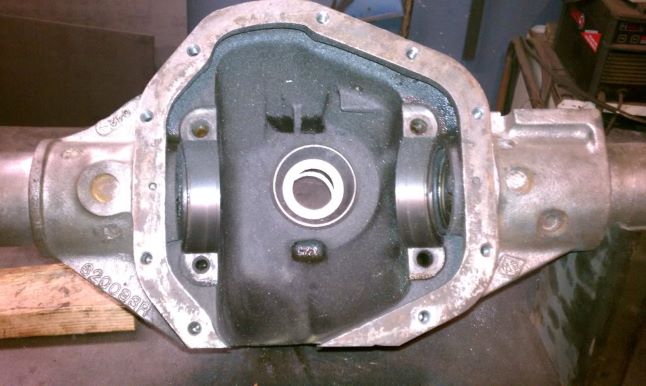
DANA 60
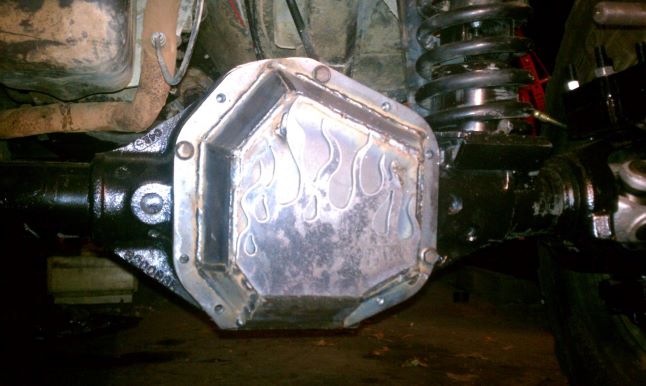
We also shaved the Dana 60 housing and built a custom diff cover.
Finished axle

REAR AXLE
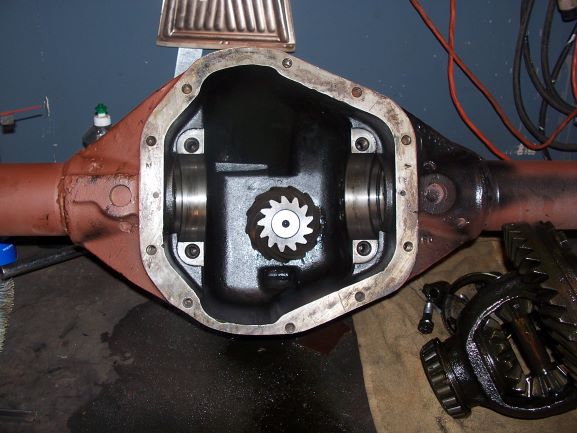
For the rear axle we used a Dana 60, did a slight shave, installed disc brakes and used a Detroit Locker.
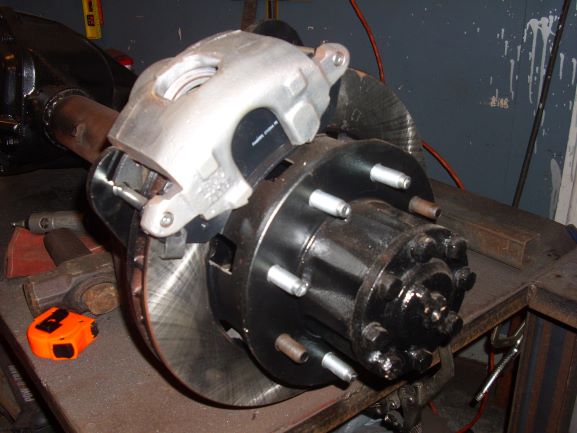
Disc Brake conversion part numbers using parts for a 1985 3/4 ton 4x4 Chevy Pickup.
Caliper Plates we purchased from Great Lakes Offroad
Brake Pads - MKD153
Brake Rotor - YH141049
Brake Calipers - 184208, 184209
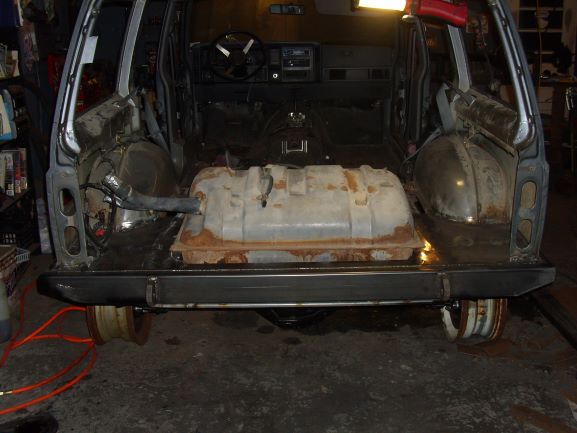
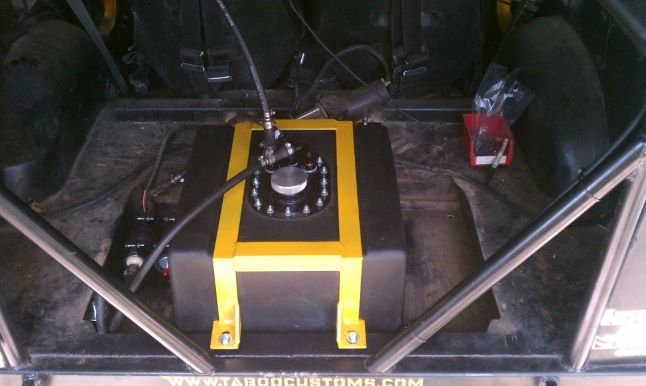
GAS TANK RELOCATION
At first the plan was to use the stock tank. We then decided to install a fuel cell.
CUTTING BRAKES
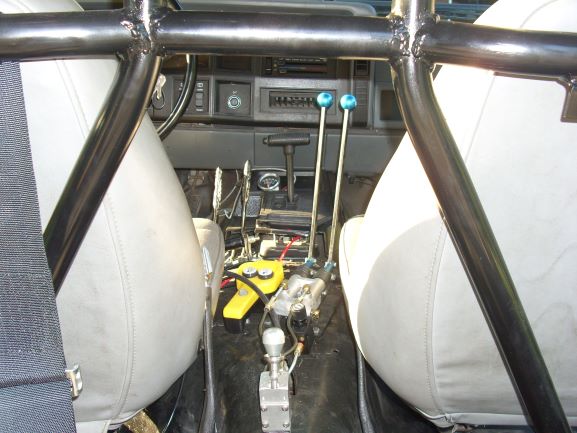
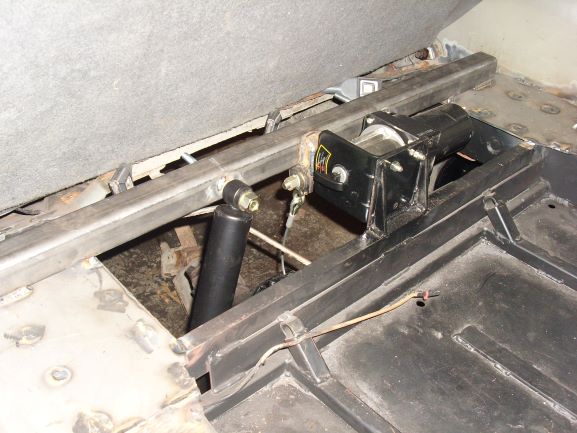
REAR WINCH (suck down winch)
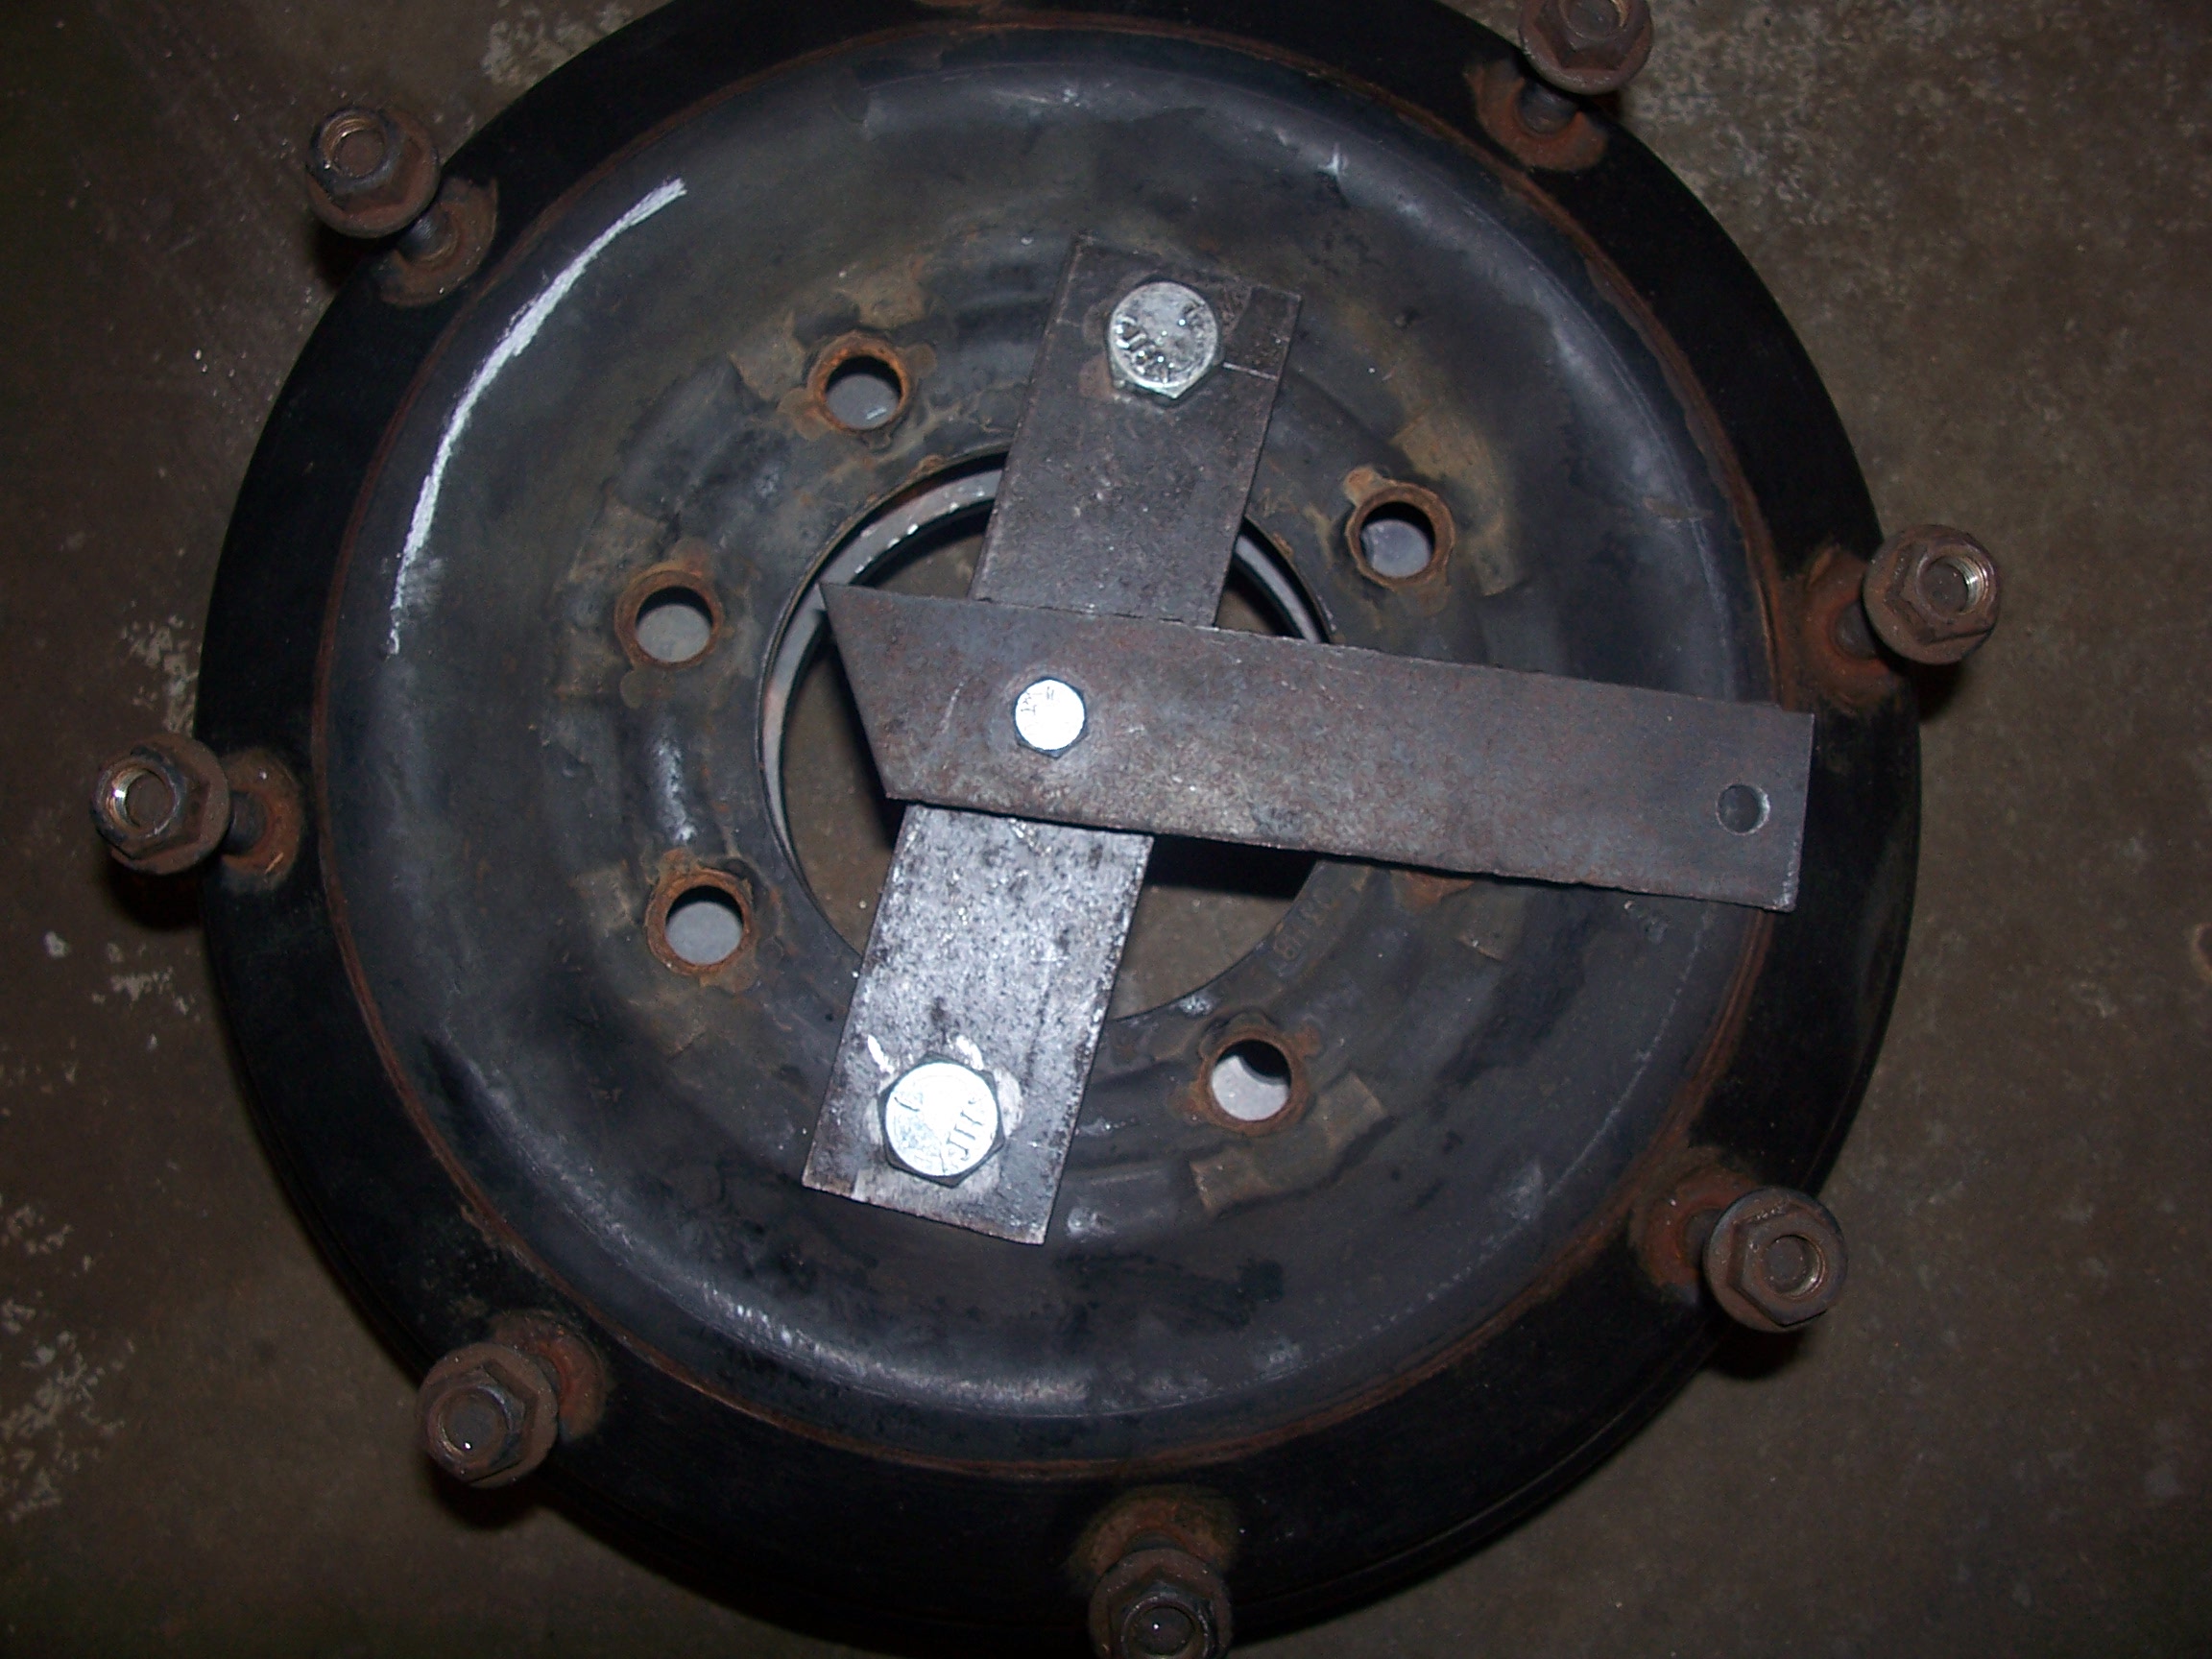
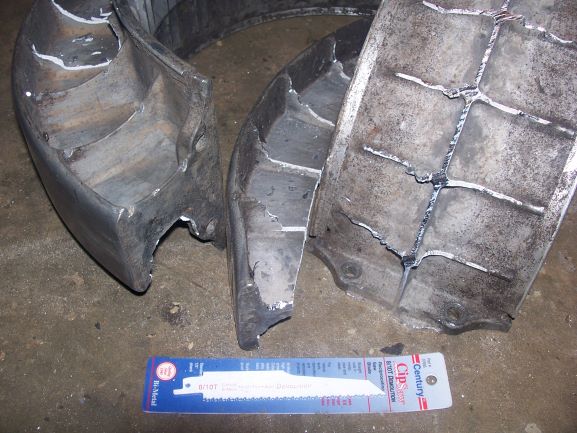
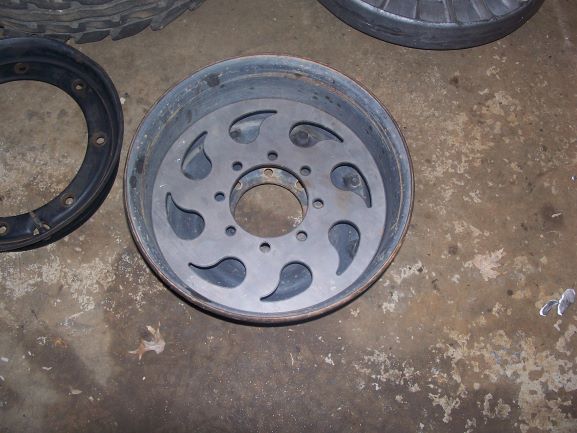
BEADLOCKS
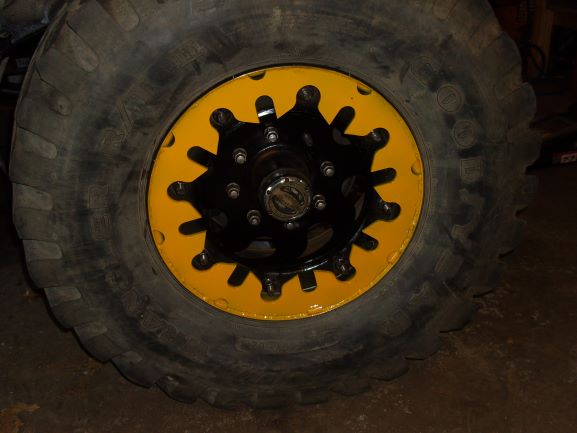
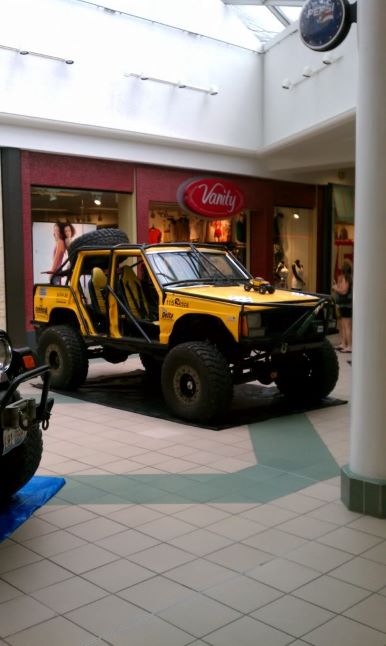
FINISHED PICS
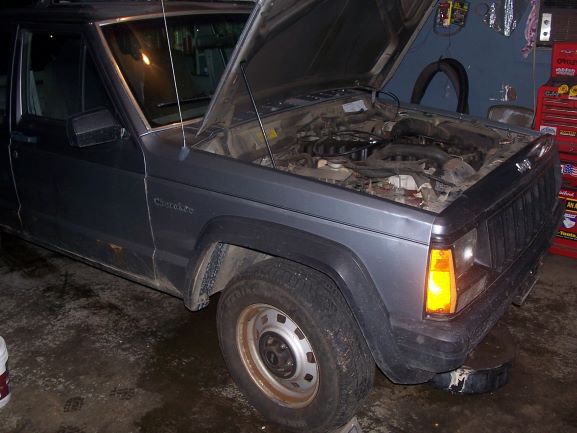
IT RETURNS – JUNE 2019
It is back….after being gone for 7 years where it mainly sat in a garage while getting an engine swap, we have it back. Very few jeeps can I say that I would really like to have back but this is one.
Of course we love to have screwy timing on projects and this was no different. We traded our normal wheeling jeep to get the XJ back but the issue was that we had an event at the Cliffs in 3 weeks
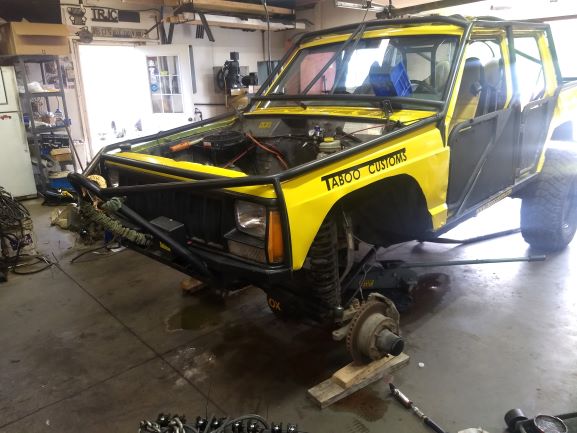
When we sold the XJ we stripped the axles, engine, transmission and transfer case out to go into the new CJ7 that we competed in. We then put the previous axle back in the XJ, a HP Dana 44 and a Dana 60.
The new owner then started putting a 350, 700R4 and 241C in, which when we go the jeep back was about 70% complete.
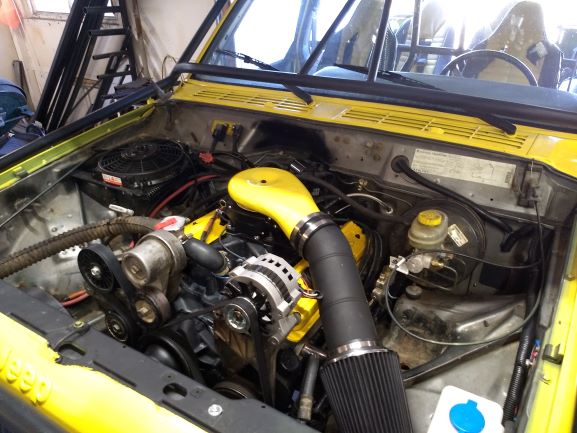
Over the 3 weeks leading up to our event we finished up the engine, installed a new Novak XJ V8 radiator, repainted the entire jeep, finished and cleaned up the dash, and several other small items.
The main issue was that the Novak radiator lead time was out a couple weeks. We had to actually have the radiator shipped via 2-day shipping to get it here the day before we left for the trip. Unfortunately when it was installed and we did some shake down runs we could not control the temperature. After some investigation we could only assume that we had a blown head gasket. Later we verified this was the case. In addition we had some issues with the starter to flexplate interface and the used shifter we had retrofitted broke inside the cable. In the end we had it done but not with enough time to deal with the issues that popped up.
For the blown head gasket we debated fixing the current engine, buying a whole truck and swapping in another unknown condition 350, or just getting a reman. In the end we plan on this being the main wheeling jeep for a while and I don’t want to have to worry about unknowns so we decided to go with a Jasper reman.
Prepping to install the Chevy 350 reman engine. Typically on XJs I would pull the entire grille and radiator out but due to the cage wraping around the front this wouldnt work. The next best option was to remove the tires and set the front axle down on the ground to get enough height to get the engine in and out.
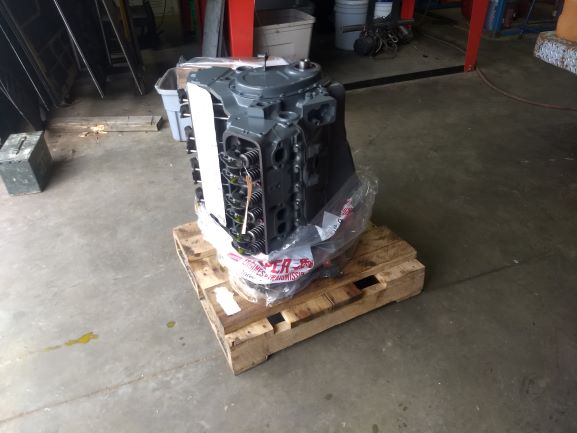
We installed the Jasper reman along with the original carburetor from the previous engine. The carburetor was in need of some TLC and since we didnt plan on keeping it very long we went ahead and purchased a Holley Sniper kit so we could swap over to EFI.

When we purchased the sniper kit we purchased the full kit with the fuel pump and all. The installation is pretty simple, other than running fuel lines and wiring the only difficult or time consuming item is installing the oxygen sensor. I did however run into an odd issue which at first I thought was a Holley kitting error. A few weeks before installing this kit we installed a 2 barrel Holley Sniper kit on a 1972 J4500 pickup. This 2 barrel Sniper kit included a hardware kit which was for the most part not used, except for the studs to connect the throttle cable to the throttle body. The 4 barrel kit did not include the hardware kit, which at first I thought was an error. I called Holley and apparently a year ago they stopped including the hardware kit in the Sniper Kit and I recieved a kit that must have been on the shelf at my distributor for a while. Luckily though the stud we used on the J4500 was not the studs we needed for the GM engine so we were able to use the excess parts from the 2 barrel kit.
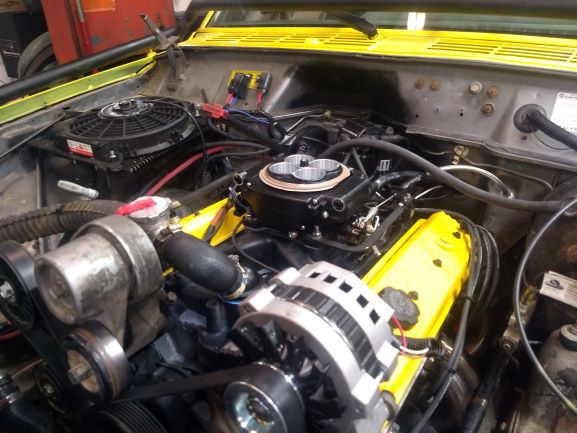
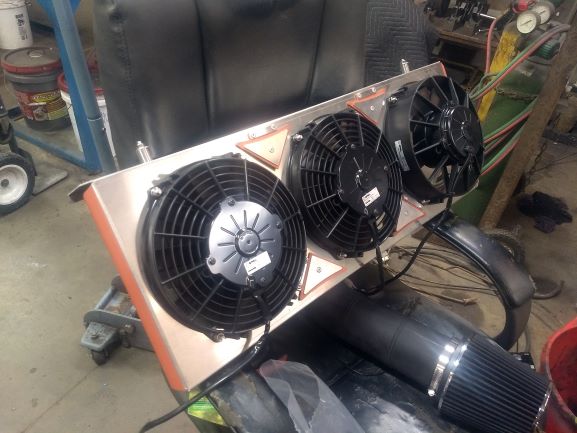
Upon installing the Sniper Kit we still found that the engine was wanting to overheat. When we originally purchased the Novak radiator we attempted to save some money by making our own shroud and using our own fans. Unfortunately this didnt work out so we had to order the Novak 3 fan setup. Even with this setup we still saw engine temps between 210 and 220 while driving. However sitting at idle the temps would hover around 205-210. Our hose setup is not the greatest so we plan on first getting some better flowing hoses, then looking at hiflow water pumps, oil cooler and possibly even installing two pusher fans in front of the radiator.
ORINGINAL FAN SETUP
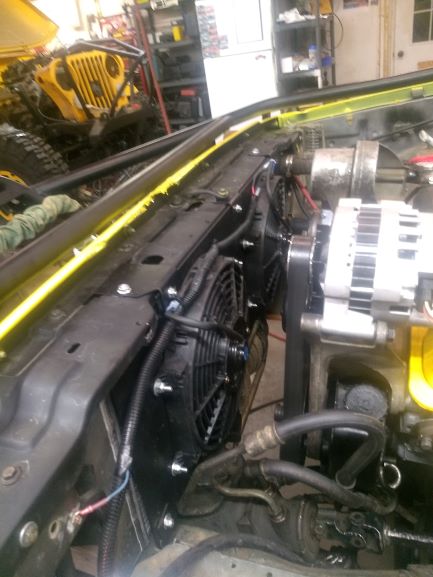
NOVAK FAN SETUP
For the air intake I found a low profile plenum from Spectre and used a Spectre cone style air filter. Will need to build something to support the filter on the inside of the fender.
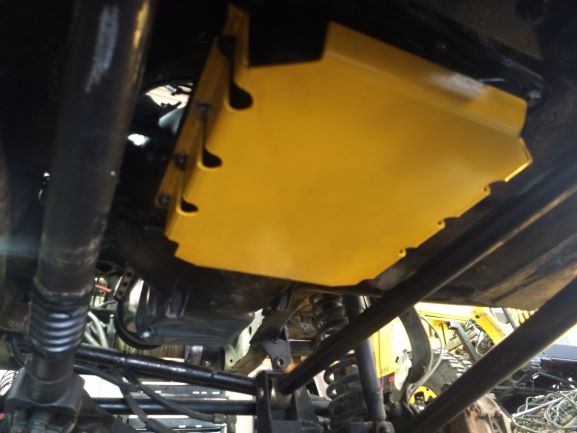
700R4 - The Novak radiator does not have provisions for a transmission cooler so we had to install a cooler in the back passenger area of the engine bay. We also build a transmission pan skid plate. These skid plate are or will soon be available in our web store.
FINISHED PICTURES